CyberFOX VPN — Setup & Payment Guide
Follow these simple steps to activate and start using your CyberFOX VPN subscription.
Our system is built with maximum privacy and ease of use in mind — no accounts, no tracking, no email required.
Step 1 — Choose a Plan
Visit our Pricing Page and select the subscription that fits your needs:
- 6 months
- 1 year
- 3 years
Step 2 — Make a Payment
You can pay securely using:
- 💳 Credit or Debit Card
- 💎 Cryptocurrency (BTC, USDT, etc.)
All payments are processed via trusted third-party providers. We do not store or collect any billing data.
Step 3 — Receive Your Private Access Key
Once payment is complete, you’ll receive your private authorization key. This key is the only way to access your VPN.
⚠️ Important:
For your privacy, we don’t collect your email address.
This means your key cannot be recovered if lost.
Please save it securely — write it down or store it in a password manager.
Step 4 — Log in with the Key & Access Panel
On the Login Page, paste your authorization key into the login field and click Access Dashboard.
This connects your key with your private dashboard, where you can manage or regenerate access if needed.
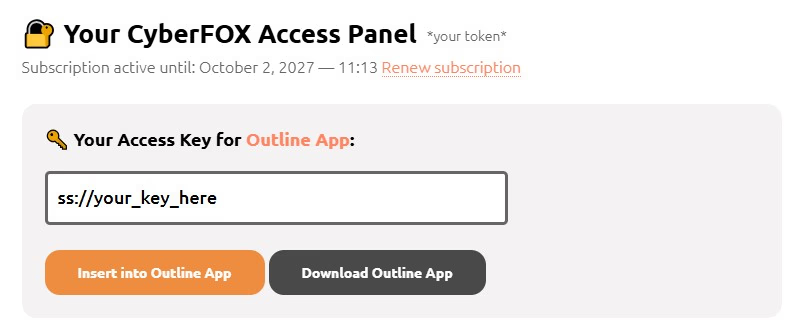
Step 5 — Install a VPN App (Outline Recommended)
To connect, install any app that supports Shadowsocks5 protocol.
We recommend the Outline app — available on:
- 📱 iOS / Android
- 💻 macOS / Windows
One key works on unlimited devices. You can use it on multiple phones, laptops, and even routers.
Step 6 — Change Location (Optional)
Want to switch your server region?
- Go to Advanced Settings in your dashboard
- Select a new location
- Copy the new key
- Re-import it into the Outline app
Each location has its own access key. Switching is fast, easy, and keeps your browsing ultra-private.
🟢 Need Help?
Contact our support team via email: cyberfoxvpn@protonmail.com
We’ll reply promptly — no logs, no tracking, just help.